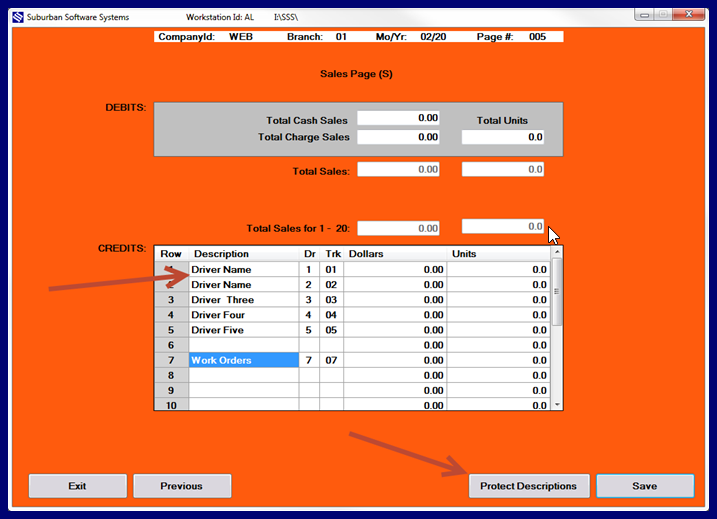
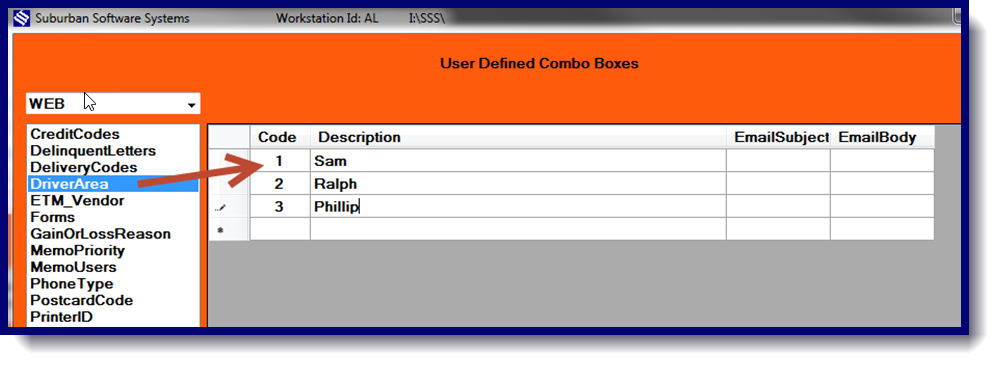
There are two places to add a new driver for data entry.
Daily Menu
- Open up the Control Page.
- Pull up the page # in Control and Receipt Totals
- Enter the “S” page #.
- Click on Unprotect Fields at the bottom.
- Add the driver’s name, number and truck number if applicable
- Click Save. This will add the driver # in data entry when the tickets are entered.

Utility Menu
- Click on User Defined Fields
- Click Driver/Area on the left
- Add the driver # and their name.
- This will allow you to assign the driver # and name in the Customer Update screen to deliver to that account.

